

I have been telling you that raw edge quilts can be done by even a beginner so I have made a tutorial to show you all just how easy they are. I decided to go a little crazy with the fabrics in this quilt but I like how it turned out.
This is a Baby/Toddler Quilt. Finished size is 38" x 38"

Fabric Requirements
8 - quarter yard fabrics for the squares (I used more than 8 but if you are trying to cut down on cost and excess fabric, 8 will be enough for this quilt)
1 Yard of fabric for the background (I went busy with the checkers but a neutral fabric would be great. 1 yard leaves little room for error so if you feel more comfortable, get 1 1/8 yard)
1/2 Yard of fabric for the border (This gives you a few inches of play for mistakes)
1/3 Yard of fabric for binding
1 1/8 Yard of fabric for backing
1 Baby Size Batting (I use warm and white)

Cut 4 strips of your backing fabric at 8.5"

Turn your fabric sideways and while the fabric is still folded, cut at 8.5" making a 8.5" square. I actually stacked my fabrics on top of each so that I could get my cutting done more quickly. You will need a total of 16 - 8.5" squares.

This is actually a fat quarter, but you can use either. If you are using a standard quarter yard and have 8 fabrics, keep your fabric folded in half with the selvage edges touching. Cut at 7.5" Turn sideways, cut off the selvage and cut at 7.5" making 2 - 7.5" squares.

Next cut your fabric at 5.5", turn sideways and cut again at 5.5" leaving you with 2 - 5.5" squares

Next at 3.5", turn and cut again at 3.5" leaving you with 2 - 3.5" squares

Once you have completed cutting all 8 of your fabrics, you should be left with 16 squares at 7.5", 5.5", and 3.5"

Now you get to lay all of your cut fabrics out and set them up in a way that looks beautiful! The checkered print that I used for a background was an afterthought for me which is why it is missing from this photo. You would want to put your backing print down under each large square because this is your first glimpse of what the finished quilt is going to look like...

Lay your first square on top of the background square and turn it a little off kilter. Put your need about 1/4' in and begin sewing, stop about 1/4" from the edge, lift your presser foot, turn the fabric and continue down the next side. Make sure that when you are sewing, your needle is set to stop in the down position. I also back stitched when I got to every corner.

Flip your square over and snip a little hole in the fabric making sure not to cut the fabric in the front. Cut around it leaving about 1/2" from your sewing lines. This will cut out on excess weight to the quilt. You do not want to cut too close because this quilt is going to fray some and you want to leave a little room for that.

Put your next square on top and turn a little off kilter and sew it on.

Don't forget to snip the backing off after each piece that you sew on.
Place the last square on top, sew, and snip

Once you have set your squares the way you like them, you are going to sew them in rows with 4 blocks each.

After all of your squares are sewn into rows, you now can sew the rows together.

You are now ready for your borders!

Cut 4 strips of your border fabric at 3.5" and then trim off selvage

Measure 2 border pieces by the length of middle of your quilt. This is how I do it, I just make sure it is totally flat, set my border strips on top, and cut at the right length.

Sew the border on opposites sides of the quilt. The border is cut to the size it needs to be so make sure that you are adjusting accordingly when you are sewing, you will end up with major puckers if you are off on your borders. Oh and... I don't use pins... "gasp". That is probably the reason that I feel like such a slacker when it comes to quilting.

Now cut the remaining 2 border pieces to the length of the quilt with the added borders.

Yippee your top is now done!!! You are ready to baste. I use basting spray which I love but you can baste whichever way you like.

I began by quilting directly over my lines that I had already sewn around each one of the squares.

Next I stitched in the "ditch" down each row, I used fabric chalk to draw in a line that I would follow through the border to the end.

I started in the middle row and worked my way out.

I sewed down the "ditch"

Then a 1/4" to the right of the center
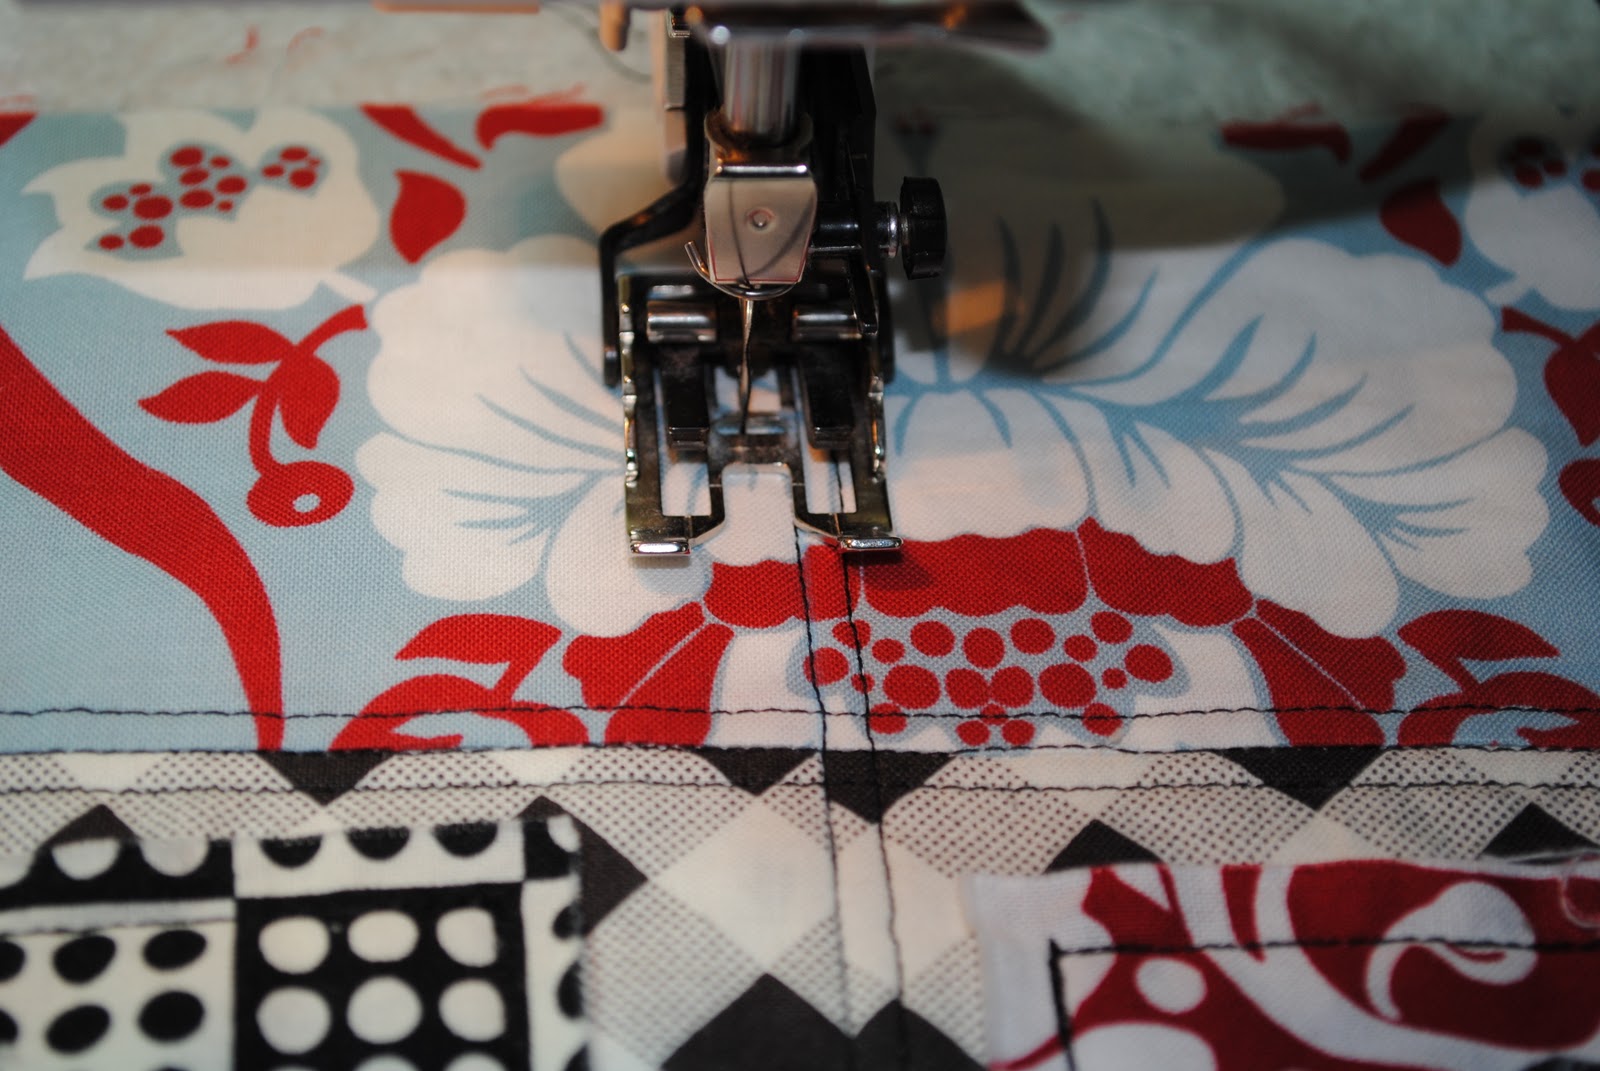
Then a 1/4" left of the center

This what it looks like once your lines are completed.

Once you have completed quilting it, you can now cut off your excess batting and backing and bind it! Almost there!!!

Cut 5 strips at 2.5". 4 strips will work, but it is really close. I am not going to go into a lot of detail on the binding of this quilt, but I left my binding raw so I wanted to show you how I did it. All of the bindings that I have done I have done fully by machine. I know that a hand sewn binding is so much neater and more professional, but when I get to this point, I just want the thing finished, so I take the easy way out. I printed out this binding tutorial here and I use it with every quilt I make.

I sewed my folded binding with the creased edge to the outside of the quilt. If you were going to do a normal binding, you would do the opposite.

When I pulled the binding to the front side of the quilt, the raw edges were exposed, once I washed it, the borders frayed like the rest of the raw edges of the quilt.

Here it is, out of the dryer with all of the fraying clipped nice and neat. There will be a ton to clip once you take it out of the dryer, but I love the raw edge look.

Good luck! Please email me if you have any questions. If you choose to make the quilt send me pictures of it completed, I would love to see them...
Darla
did you make up that pattern? wow you are talented! great post,
ReplyDeleteBonnie
K. You put the batting and the backing on before you sewed all the middle line things right? What does basting mean? Is that the middle sewing you did or what? *sigh* I'm so weird... but I wanna make a quilt like this! I love this style!! :)
ReplyDeleteYes Ronda, I put the batting and backing on before sewing the middle things. I realized while I was doing the tutorial that I could have made 3 or 4 tutorials out of it because if you weren't a quilter you might not know what I was talking about. Basting means putting the top, batting, and backing together. Because I quilted this straightline, you can just pin it. First lay down your backing with the print facing the ground and straighten it out so there are no wrinkles. Then lay the batting on top of it, and smooth out the wrinkles. Then lay the top on the top of that with the pattern facing you and smooth out all wrinkles. Then you are going to pin it all together every 2 inches with baby pins. Make sure not to put the pins close to where you are going to sew so you won't have to remove them until you are done. Start in the middle and work your way out. I hope this make sense, if not email me... wuorid@gmail.com ... I will respond fairly quickly. I prefer basting with a basting spray which is kind of a spray glue but it makes my floor kind of sticky... lol! You can find this at any Joanns or sewing store. With the spray, I first lay out the batting, then I lay the backing down with face up and I roll it half way down. I will squat in the middle of the quilt and spray about 5 inches and slowly smooth the quilt over the spray making sure not to have wrinkles. Once I am done with one side I turn around and roll the other side back and do the same thing. Then I flip it over and put the top on face up and do the same thing. I kind of showed a photo on the tutorial under the quick basting note that I wrote.
ReplyDeleteDarla
Oh and Bonnie, yes, I did make this quilt up myself. I am sure there is someone out there that has made one similar, but I haven't seen this exact one yet. It was fun making something up, gives me something to do with all of the extra fabrics that I have... What to do next...
ReplyDeleteDarla
So cute! I love it.
ReplyDeleteI am going to try this with some of my homeless fabrics leftover from other projects.
ReplyDeleteBeautiful modern quilt! Thank you for the great tutorial. I have never made a quilt, but very interested in trying (so far got quite a lot of books, fabric and some tools). I like the raw edges and it seems like a cool way to get started, because it doesn't matter so much if it's not perfect - the actual quilting doesn't look too daunting either! - Have to give this a try :)
ReplyDeleteDid you wash all of your fabric first?
ReplyDelete